Just in case you've missed me say how much I love red and turquoise together, here are some random shots around my house.
When I saw this blog post over my new friend Terri's site, I knew I had to join in over here.
These are my fabrics so far. I still need two more fabrics. I'm gonna finish up Let's Make a Quilt first, so don't worry about that.
I just had to share the yumminess with you.
I can't wait!
By the way, can anyone tell me the difference between aqua and turquoise?:)
xo,
Chrissie
Tuesday, September 29, 2009
Monday, September 28, 2009
Birthday gift
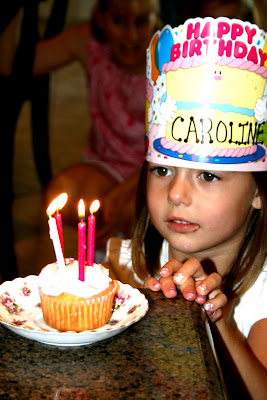
I made this birthday shirt for our little friend Caroline's 4th birthday. Her mom bought the adorable skirt and I just matched up some fabric and appliqued the cupcake on. There's a tutorial on my side bar if you want to make one too.
For her gift I painted her a picture for her room. It is similar to the one I made Ava here, but personalized for her.
I happen to think handmade gifts are the best. :)
Sunday, September 27, 2009
Tea Party
Ava's friend turned four yesterday and her mom (my friend Rachel) threw a tea party for her. We had such a good time! I thought it was a great idea for a little girls party. Rachel needs to blog about all her creative ideas but she is a very busy lady. So I thought I would do it for her:)
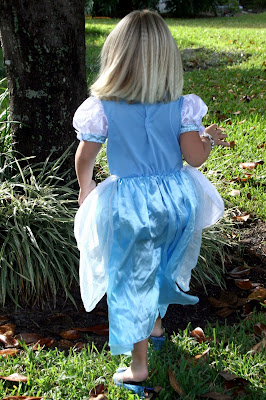
Remember when I bought this Cinderella costume at GW for $3.99? It turned out to fit Ava wonderfully. All the girls invited dressed up for the tea party.
Remember crimping? (circa 1980's?) We crimped Ava's hair, and I let her wear a little lipstick. The accessories were a must!
It was a "girls-only" party! (Yes, I'm growing my bangs out...Again!)
When they came into the party there was a manicure station set up...
A station to make bracelets or necklaces...
And of course hats!
Rachel is great on a budget and found all these flowers from a spring clearance. She used fabric on the little tables and the girls got to drink out of real tea cups.
They also played Musical Chairs and Freeze Dance.
Thanks for letting me share your ideas Rachel!
Have a great Sunday friends!
xo
Chrissie
Wednesday, September 23, 2009
Tutorial-Miniature Stuffed Candy Corns
It may still be in the upper 80's here, but I'm pretending it's Fall. I got all my Fall Decs out of the attic last night. I got inspired today to make a new Fall project.
And since they turned out pretty cute, I thought you might want to make some. But you have to promise me that you'll show me yours if you make any:)
Step 1: Draw out a piece of candy corn. (or download a template from Google) Cut it out and trace it on some muslin. Leave enough room for two, so you can sew them together.
Step 2: Slip a piece of cardboard under the muslin and then paint your candy corn. I just used regular acrylic craft paint.
Step 3: Make as many as you want. I only made five. Now I wish I had made a lot more. Let them dry completely.
Step 4: Coffee stain them. The longer you let them soak, the darker they will be. I think I would have liked mine a little darker.
Step 4: After they completely dry, I used some brown paint with a dry brush to kind of age it a little more.
Step 5: Okay, this is a little embarrassing, but I didn't have any polyfil. So I used good ol'cotton balls. Lay them on top of the back of your candy corn.
Step 6: Lay another piece of muslin on top of that and pin it.
Step 7: Straight stitch it all the way around. Cut the shape out, leaving about 1/4" of muslin outside of the stitch line. You're done!
This pretty wooden bowl is filled with some faux moss rocks, and a cute new acorn I found at Joanne's on sale.
I think I may make them again and make a long candy corn banner. That would be cute, huh?
I'm participating in Kimba's DIY this week. I hope you enjoyed the tutorial!:)
Quilting Week Six: We're Quilting, We're Really Quilting!
We made it to Week Six, but I've got a few confessions to make:
2. Lay your batting down. I used a pre-packaged queen size batting. Starting in the center, smooth it out working toward the edges. It will still look wrinkly and puckered, but that's okay.
- My quilt is far from perfect. None of my squares really match up evenly. My girlfriend told me what I did wrong. I pressed all my seams the same way. Apparently you need to alternate pressing rows. For example, the seams on the first row should be pressed to the right. The next row should be pressed to the left. And so on. Lesson learned!
- Even though I'm showing you how to quilt today, I'm not done with mine. Nope.
- This might be the last quilt I "quilt". I think I'll stick to the fun part, which is making the quilt tops. Next time I think I'll send it out to a professional. I'm glad I'm doing it, but it's a lot of work!
Okay, so let's baste the quilt!
1. Make sure your floor is clean and lay your back fabric down. You want it nice and tight, but not stretched tight. Use duct tape to tape it down.2. Lay your batting down. I used a pre-packaged queen size batting. Starting in the center, smooth it out working toward the edges. It will still look wrinkly and puckered, but that's okay.
3. Using the directions on the can, spray your basting spray over the batting. Carefully lay your quilt top down on top, and working from the center agian, smoothe out the fabric to the edges.
4. I used curved safety pins to adhere all the layers together. You should pin every 4" to 6". I'm aware the basting spray AND pins aren't necessary, but it made me feel "safer".
5. Remove the tape and cut off the excess batting, leaving a few inches on.
6. Using a straight edge and a chalk marking pencil, I drew straight lines all the way around the border. (Be sure to use water to remove the marks before any pressing!)
7. Use a straight stitch to quilt all the straight lines.
Because of the imperfections I mentioned earlier, I decided to go with a decorative stitch when quilting the squares. I know a lot of people would "stitch in the ditch" along all these lines, but I am a glutton for punishment!:)
I can't wait to wash it and see the finished product!
Tuesday, September 22, 2009
Big Sale-Day 3
Day 3 of the Big Sale. Thanks to those of you who are helping me reduce my inventory. You know what that means right? New things to make!!!:)
(Don't forget, all sale items include free shipping!)
#1. Mosaic Mermaid
Measuring 24" high, this mermaid is made of tiles and real shells. Her face is hand-painted. The piece is sealed and ready to hang.
$50
SOLD, THANKS!
#2. Set of four Christmas cards
There are four handmade Christmas cards here, using scrapbook paper, stamping, and buttons. They all come in seperate sealed packages for protection.
$5 (for all four of them)
#3. Mixed-Media painting
"Have a Fabulous Life"
This piece is painted on a piece of wood measuring 18 x 24".
It has various elements of mixed media, including the flower that has been cut out of wood seperately and is three dimensional.
$45
This painting is made on wood and measures 8 x 8".
$8
This painting is made on wood and measures 12 x 12". It is embellished with hearts made from scrapbooking paper, and is sealed with a shiny varnish.
$15
(Sorry about the poor photo quality)
This mosaic is made using all handmade tiles. I cut the clay, glazed them, fired them, and broke them all up for this inspirational mosaic. It measure 8 x 12" and is grouted with black grout.
$45
#7. Some Goals...This mixed-media painting is made on a piece of wood measuring 8 x 8", and includes a small paper posie in the corner.
$10
#8. Red Wine or White Wine
Tell me which one you want. Measures 12" high. Wine glasses are cut out of wood and are three dimensional.
$15
I'll be back with Week 7 Let's Make a Quilt and some cute birthday presents I made this week.
Till then...:)
Monday, September 21, 2009
Big Sale-Day 2
Happy Monday y'all! I'm having another sale day. Please remember that all sale prices include shipping.
Leave me a comment if you would like me to reserve any items for you.
#4. God is Great(white frame)
One of our favorite meal time blessings, this would be perfect in a kitchen or dining area.The 4 x 4" print comes in a white wooden frame.The original is a mixed-media painting that has been digitally enhanced. Printed onto Kodak Professional Portrait Endura paper.
$8
SOLD, THANKS!
#5. God is Great (black frame)
One of our favorite meal time blessings, this would be perfect in a kitchen or dining area.The 4 x 4" print comes in a black wooden frame.The original is a mixed-media painting that has been digitally enhanced. Printed onto Kodak Professional Portrait Endura paper.
SOLD, THANKS!
Leave me a comment if you would like me to reserve any items for you.
#1. Fabric Wall Hanging-10 commandments
This art quilt measures 8 x 18" and depicts the 10 commandments. The rainbow colored fabrics are sewn onto burlap, and then backed with black and white polka dot fabric. Hangs on a natural wood branch.
$15
SOLD, THANKS!
#2. Coloring book (I have three left)
It can be used for coloring, painting, and as templates. You can use the images to embroider, mosaic, or even quilt. I would love to see what you create with the images.The book has a front and back cover and 5 different coloring pages. It measures 5 1/2 x 9 inches and is printed on 28 lb. paper.$5
#3 Quilted Bird
This fabric bird is crazy quilted using different fabrics and mixed-media items. She measures approximately 8" x 8", and is backed with blue and white polka fabric and a small burlap hook to hang.She has these words on her body:Hearts heal.Wings mend.Life moves on.
#4. God is Great(white frame)
One of our favorite meal time blessings, this would be perfect in a kitchen or dining area.The 4 x 4" print comes in a white wooden frame.The original is a mixed-media painting that has been digitally enhanced. Printed onto Kodak Professional Portrait Endura paper.
$8
SOLD, THANKS!
#5. God is Great (black frame)
One of our favorite meal time blessings, this would be perfect in a kitchen or dining area.The 4 x 4" print comes in a black wooden frame.The original is a mixed-media painting that has been digitally enhanced. Printed onto Kodak Professional Portrait Endura paper.
SOLD, THANKS!
Go here to see the items left from Day 1.
xo
Chrissie
Subscribe to:
Posts (Atom)