PhotobucketPhotobucketPhotobucketPhotobucketPhotobucket
Showing posts with label make-overs. Show all posts

Tuesday, June 28, 2011

Welcome to Our Surf Shack

It's been a long time since I've done a before and after...
We just had the exterior of our house painted, including our pool deck, so I thought a tiny spruce up was in order.
Mike is a huge surfer and we spend a lot of time at the beach, so I wanted to give it just a little bit of a beach theme.
Our dream is to have a condo ON the beach one day, but for now we are very grateful to have a pool.
In the summer we spend at least an hour or two at here every day.


I bought this patio set a couple of years ago on sale, and it's still in good condition.  The pillows were disgusting though, and after searching high and low for new ones that would fit, I finally found some at Wal-Mart.


Where are the kids?  :)


Here is where I sit my butt and life-guard.  It's really nice when I have a friend to sit next to me...:)  Usually it's my neighbor and we are able to watch all the kids and get a little sun!


In the evening we have a swim session after dinner sometimes.  I light the citronella candle in the red tub to keep all the mosquitos away.


Of course I wanted to create some original mosaics to put out here, but for now these metal candle holders from Homegoods will work. 


I love the shells in the candle...


My kids think this is funny. 
"Why does it say "beach"?  We aren't at the beach...we are at the pool, why didn't you get one that says "pool"...yada yada yada..."
"Because Mommy likes it!!" 
;)


Oh, I almost forgot the before shots:
After saving our hard-earned pennies last summer we had the whole pool resurfaced and pavers put in.
This was after they had drained the pool and started...looks pretty bad huh?


...it was totally worth it.
:)


Speaking of before-and-after's: remember that one-week challenge I had given myself for my living room?  It has morphed into a much longer project, but I will definitely show you when we're there...

Happy Tuesday!

Photobucket

Tuesday, June 7, 2011

Super Duper Quick Make-over

It started when I went to throw this in the recycling bin. 
I wanted something to store pillow labels in and so I did a super quick (under 10 minute) make-over.


I wrapped a piece of scrapbooking paper around it and used a glue stick to stick the end down.
I covered the top with a scrap of fabric using hot glue.


I printed the doily off of public clip-art and attached it using a tiny clothespin to some twine I wrapped around the jar a few times.


At the last minute I remembered I had a few posies laying around and hot-glued it to the top.


Quick and easy :)

Photobucket

Thursday, March 24, 2011

A quick before and after

This is probably the billionth time you've seen a chalkboard make-over.  Ha!  I know I'm not getting any points for originality here.  But it's still cute and fun.  


Just in case you didn't know this, it's important to let that paint dry at least 24 hours.  Rub a piece of chalk all over it and then wipe it off before you write on it.  I'm still waiting my 24 hours :)


In other very exciting news, I got Mother-of-the-Year award this week for buying my kids a box of Fruity Pebbles.  I don't usually let them eat sugar and food coloring for breakfast, but since it's Spring Break I threw all caution to the wind ;)


I've been sewing and sewing and sewing...I've got lots of new items for my shop.  Lots and lots!  I can't wait to show you.

Ok, I'm off to find Easter eggs.  If your kids are bored, bring out the plastic easter eggs.  Mine have been playing easter egg hunts ALL week!  Totally entertaining :)
Happy Thursday!
xo,
Chrissie

Monday, October 25, 2010

My version

Remember I told you I was making my own version of this?  (Joy's is wonderful!)   Here it is:
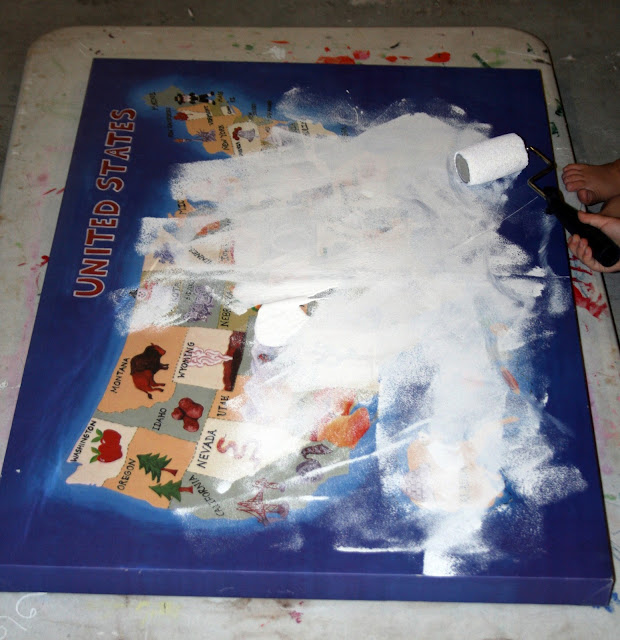
We had this huge canvas that no one wanted in their bedrooms anymore, so the kids helped me prime it.
 I used the vinyl letters from Office Max and then primed over them.
 I worked on it for a couple of days.  I would add a few layers and textures, and then go back the next day and add a few more.
 This is my favorite part...I laid a doily down and spray painted over it.  You can see here where I started taking the letters off.
 I am happy with the result!
 Here it is again.  We have no natural lighting in this room, and I'm actually still making some tweaks in there.  But I love walking in and seeing it!
I'm linking up to Blessed Little Nest today, who inspires me to make lovely things.  :)
Happy Monday!

Monday, September 20, 2010

Making my surroundings Lovely

Heather has inspired me in many ways.  Lately it is the lovely pictures of her home.  I am gleaning inspiration from her.  Learning to hold onto to decor items that I only really love.  Trying to find a balance between simple, and color and fun.  I am learning that the less items you have, the less you have to clean!  But when I go too simple, I crave some art and color.

We had our guest bathroom redone over a year ago.  After my $30 white garbage can broke last week, I replaced it with a turquoise can from Target's dollar section.  That spurred a little makeover.
I had this scrap piece of wood.  I painted it with a couple different variations of turquoise and aqua craft paint, traced the letters on, and filled them in with white paint.

I bought the shower curtain and rug at Target.  I searched a couple of thrift stores for a shower curtain but this is really what I wanted, so I got it!
The little soap dispenser is from Target too...on sale for $2.  The cross was on sale at Kirklands for $2.99.  I had the frame, and just printed the 11 x 14 print of our family beach picture on my home printer.
Everything on this wall is from the house...I tried to keep it beachy themed, but not too themed.
I've had these blocks for a couple of years now.  I think I bought them at TJ Maxx.  They've been various parts of my home.
So that's it.  I spent about $35 and I feel like we have a lovely little makeover.  :)
Happy Monday Friends!
xo,
Chrissie

Thursday, June 17, 2010

Summer Pillows

I did some summer accessorizing  this week to brighten up our home a little.  I did a little tutorial too on the pillowcases.

Head on over to The Blessed Nest for the tutorial.  I am honored to be guest hosting today (sometime this afternoon) for the Bloggers Guide to Summer.  There may even be a little give-away;)
Have a blessed day Friends!

Wednesday, April 7, 2010

A New Corner of Our Home...2

Over the last few months my kids have all shown a lot more interest in art. I do guided art projects with them regularly, but now they are all interested in drawing and coloring more often on their own. I wanted to set up a space just for them where they could go at any time and have all their art supplies ready and accessible.

I went to Home Depot and bought the two pieces of wood and painted them white. My husband screwed them into the wall for me and I hot glued the black clips from Target's dollar section on there so they could have a rotating art gallery.
I've had these three letters forever; all collected from Goodwill trips at various times. They all got a coat of black spray paint.
I had the silver buckets from Ikea and I threw away all the old mismatched, dried out, and broken markers and crayons. New art supplies are so inspiring! There is a strict rule to always put the lids back on:)
I found these magazine holders in the dollar section at Target. They hold coloring books in one and drawing books in the other. White drawing paper is all set to go in the organizer.
We set this up for the kids Sunday night so when they woke up on their first day of Spring Break Monday they would be surprised. They were all proud to see their artwork hanging and they have already used this space constantly.

I spent less than $18 on everything and used what I had. I'm pleased with the area but I'm really happy to see how excited my kids have been using it. The neighborhood kids have been enjoying it too!:)

Monday, December 7, 2009

Sweater Dress (Alterations)

I found this red sweater dress for Ava at a garage sale for 50 cents. It was begging to be altered a little.:)

Here it is before:
And after...:
I used the same applique method that I used here. I just used pieces of fabric I had in my bins. Ava insisted, (I mean asked very nicely) that the snowman be a girl. So the pink fabric had to make an appearance.
Of course a posie barrette was made to wear with it! Man, I can't believe I haven't gotten tired of making those yet.
She wasn't in the mood to model for me.


But I'm pretty sure she likes it.

I'm linking up to:
Metamorphisis Monday
Make It for Monday
DIY Day
Trash to Treasure Tuesday
and
Get Your Craft On

Wow, there is a loooooooot of cool stuff going on!

Tuesday, October 27, 2009

99 cent find leading to a million dollar question

I haven't been thrifting in a long time, but I've been on the look out for a few things so I went to Goodwill today. I didn't find anything I was looking for, but I did find this 99 cent pile of sticks.
It already had the hook on it and I didn't even want to spray paint it. I hung it in my bathroom to hang all my earrings. What do you think it was originally made for?
This is my favorite pair. I'm thinking of getting a short haircut again where you can actually see my earrings. My husband likes my hair long, and I've been trying to grow it out. But it just doesn't look like it used to.

How about you? Do you wear your hair like your husband likes it, or do you care? Or does he even care, for that matter?:)
I think we all want our husband to think our hair is beautiful, right? But if I don't FEEL beautiful, I don't think I'll look the part.
Short hair is so much easier, and in my case, I'm in need of style.
I'd love to hair (hear) ha ha your thoughts on it.
Oh, and I'm linking up to Kimm's Trash to Treasure.